- C# 97.4%
- Shell 2.6%
| Filename | Latest commit message | Latest commit date |
|---|---|---|
| .forgejo/workflows | ||
| .gitea | ||
| .github | ||
| .idea/.idea.Piero/.idea | ||
| Assets | ||
| dox | ||
| Models | ||
| packaging/appimage | ||
| ViewModels | ||
| Views | ||
| .gitignore | ||
| App.axaml | ||
| App.axaml.cs | ||
| app.manifest | ||
| config.default.json | ||
| config.json | ||
| Converter.cs | ||
| Converters.cs | ||
| CustomEventArgs.cs | ||
| Paths.cs | ||
| Piero.csproj | ||
| Piero.sln | ||
| Piero.sln.DotSettings.user | ||
| Program.cs | ||
| README.md | ||
| ServiceCollectionExtensions.cs | ||
| ViewLocator.cs | ||
| Watcher.cs | ||

Piero
Piero is a video conversion and proxy generation tool for editors using DaVinci Resolve. It is meant for Linux and especially helpful for the free version but will also work for Studio version and should work for Windows, too.
Point it at the folders where your camera or screen-recording dumps end up; Piero watches them and automatically produces edit-friendly main files and lightweight proxies the moment new clips arrive.

Tutorial video
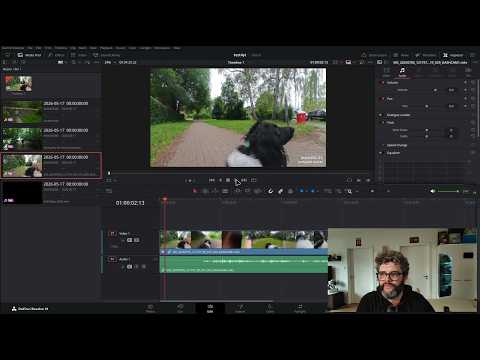
The free Linux version of DaVinci Resolve cannot read H.264 / H.265 files directly (that requires a Studio license), and many native camera formats scrub poorly during editing. Piero solves both problems by transcoding new files into containers and codecs that Resolve Free imports cleanly and edits smoothly.
Installation (Linux)
The easiest way is to simply download the AppImage, make sure it is executable and run it.
Required packages
| Package | Debian/Ubuntu | Arch |
|---|---|---|
| .NET 10 Runtime (NOT required when using the AppImage) | dotnet-runtime-10.0 |
dotnet-runtime |
| ffmpeg | ffmpeg |
ffmpeg |
.NET 10 is currently a preview release. On Ubuntu/Debian you can install it from the official Microsoft package repository, see learn.microsoft.com/dotnet/core/install/linux.
Running Piero manually
- Download the release archive for your platform from the Releases page.
- Extract it somewhere convenient, e.g.
~/Apps/piero/. - Start the application:
dotnet ~/Apps/piero/Piero.dll
Piero stores its configuration under ~/.config/piero/config.json and its
log file under ~/.local/state/piero/. The bundled config.default.json
inside the install folder serves as a fallback if no user config exists yet.
Desktop icon

Once started, Piero appears on your desktop / in your application launcher with this icon.
Usage
Main window
You should be able to start right away by adding a folder using the "Add Folder" Button. You can change the general Settings. with the gear icon (eg. the ffmeg-location)
You can also change the Video Settings for the main video and prox on the bottom which opens the Conversion Settings
Application Settings

Settings are saved to ~/.config/piero/config.json .
Output paths
- Main output — directory where main (edit-master) videos are
written. Relative paths (e.g.
./Piero) are resolved relative to each watched source folder, so converted files end up next to the originals in a subfolder. - Proxy output — same idea for proxies, conventionally
./Piero/Proxy. I strongly recommend using relative paths (and then it must be./Proxybelow the main Output). If you use an absolute path instead you will have to tell Resolve about its location.
Conversion Settings

Not all codes support Hardware Acceleration and you might have to install a driver for that.
Video codec — radio list. Some codecs carry small badges:
$— Resolve Studio only on Linux (H.264 and H.265 cannot be imported by the free Linux version of DaVinci Resolve).!— container restriction; hover for the tooltip listing the compatible containers.
If HDD Space is no problem I recommened Using ProRes. Conversion can be slow but working in DaVinci is fast. If you have a beefy machine you might try VP9 instead. It support Hardware Acceleration on encoding and the file sizes are smaller but might not work smooth in Resolve if your Machine is slow.
Advanced config
A handful of settings can only be configured in the config. There is a reason for that: You should know what you are doing there.
| Key | Purpose |
|---|---|
WatchRenames |
When true, files that are renamed into a watched folder are also treated as new arrivals. Useful for tools that upload via a temporary name (.partial, .tmp) and rename to the final name at the end. |
LogFile |
Override the path of the log file |
MainQuality / ProxyQuality |
The quality knobs the structured Conversion Settings dialog plugs into the rebuilt ffmpeg command. Two independent profiles let you have e.g. crf 18 for main but crf 23 for proxy without touching the per-preset commands. |
FfmpegConfigs (adding entries) |
The list of presets shown on the Main video track. You can edit existing entries from the Conversion Settings dialog, but adding brand-new presets currently requires appending an object { "label": "...", "command": "...", "description": "..." } here by hand. |
FfmpegProxyConfigs (adding entries) |
Same as above for the Proxy video track. |
MainQuality / ProxyQuality shape
Each profile holds the per-codec quality knob that Piero substitutes into rebuilt ffmpeg commands. Lower values mean better quality / bigger files.
"MainQuality": {
  "H264Cpu":   18,     "H264Nvenc":  20,   "H264Vaapi":  20,   "H264Qsv":  22,
  "H265Cpu":   20,     "H265Nvenc":  22,   "H265Vaapi":  22,   "H265Qsv":  24,
  "Av1Cpu":    25,     "Av1Nvenc":   25,   "Av1Vaapi":   23,   "Av1Qsv":   25,
  "Vp9Cpu":    25,
  "ProresProfile": 3,
  "DnxhrProfile":  "dnxhr_hqx",
  "DnxhrPixFmt":   "yuv422p10le"
},
"ProxyQuality": {
  "H264Cpu":   23,     "H264Nvenc":  25,   "H264Vaapi":  25,   "H264Qsv":  27,
  "H265Cpu":   26,     "H265Nvenc":  28,   "H265Vaapi":  28,   "H265Qsv":  30,
  "Av1Cpu":    32,     "Av1Nvenc":   32,   "Av1Vaapi":   30,   "Av1Qsv":   32,
  "Vp9Cpu":    32,
  "ProresProfile": 0,
  "DnxhrProfile":  "dnxhr_lb",
  "DnxhrPixFmt":   "yuv422p"
}
Credits
App icon: “Artist” , designed by
Benedikt Groß for the OpenMoji project —
licensed under
CC BY-SA 4.0.
The source SVG is shipped in Assets/piero.svg; the rendered .ico
in Assets/piero.ico is a derivative of the same asset and inherits
the CC BY-SA 4.0 licence.